
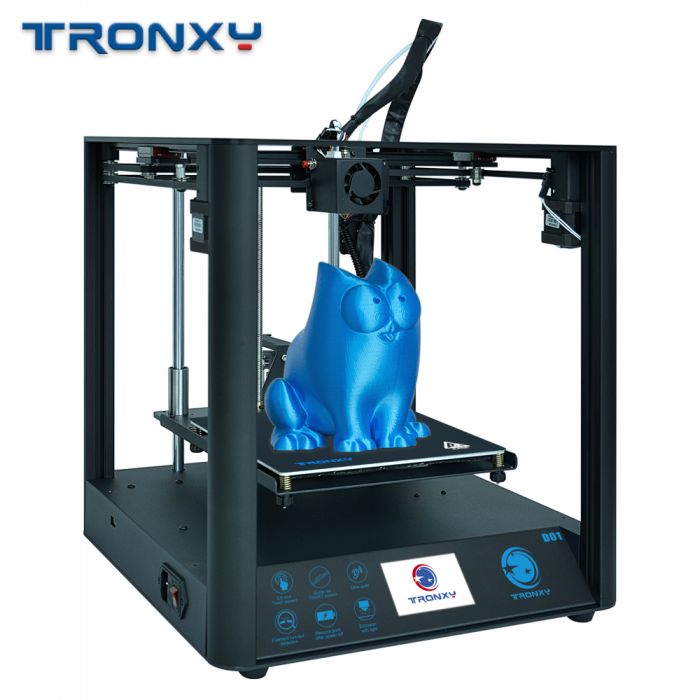
Description
Tronxy 3D Printer with Dual Extruder are the original FDM-Dual Color 3D Printer by Tronxy. X5SA-2E have double-injection and one-out nozzle design. Two filaments, two extruders, one nozzle. Large Build Volume: With a build volume measuring 330 mm x 330 mm x400 mm, you can build large projects with more ease. The benefits of dual extruder 3D printers are obvious. You can print two-color objects without pausing and swapping out the loaded filament in mid-print. You can also print elaborate 3D models. In other words, the complex ones that require support materials.
Features
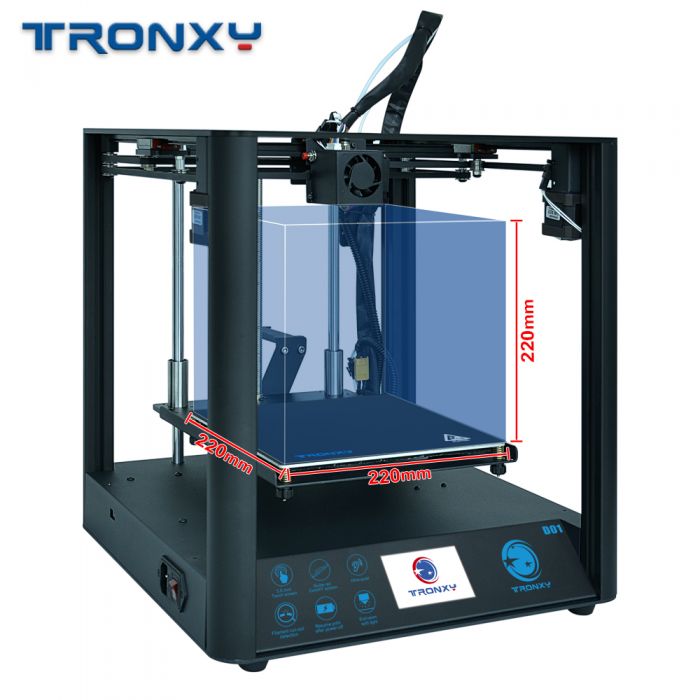
- Print size(L*W*H):330*330*400mm
- Machine size(L*W*H):639*580*658mm
- Packing size(L*W*H): 608*552*215mm
- Power Supply: 110V/220V 30A
- Machine weight:≈11.5kg
- Packing weight:13kg
- Standard Nozzle diameter: 0.4mm
- Connection:USB interface.TF card
- Extruder temperature:170~275℃
- Hot bed temperature:Support
- Printing material support:PLA,ABS,HIPS,WOOD,PVC,NYLON and so on
- Positioning accuracy:XY axis:0.012mm;Z:axis:0.004mm,Double and so on
- Extruder:Air cooling heat dissipation,Thermistor temperature control
- Structure materials:Aluminium Profile+sheet metal
- Heat Bed: Max 90 degree celsius
- Single or Dual Extruder
Tutorials
Cura is a slicing software used for preparing 3D printing files for printing. To use Cura, follow these steps:
- Install Cura: Download and install the latest version of Cura software from the official website.
- Connect your 3D printer: Connect your 3D printer to your computer via USB or Wi-Fi.
- Load 3D model: Load the 3D model you want to print by clicking on “Open File” in Cura.
- Select printer profile: Choose the profile for your specific 3D printer from the list of available profiles.
- Adjust settings: Adjust the settings such as layer height, infill, and print speed according to your preferences.
- Slice model: Slice the model by clicking on the “Slice” button. This will generate the G-code file, which is the code your printer uses to build the model.
- Save G-code: Save the G-code file by clicking on “Save to Disk.”
- Print: Load the G-code file onto your 3D printer and start printing.
Note: Before starting your first print, it’s recommended to do a test print with some basic model to ensure the printer is calibrated correctly and the settings are appropriate for your specific 3D printer.


Robo Admin T –
Amazing Item!