Description
The Tronxy X-1 desktop 3D printer kit is a great way to get into 3D printing without committing to an expensive printer.
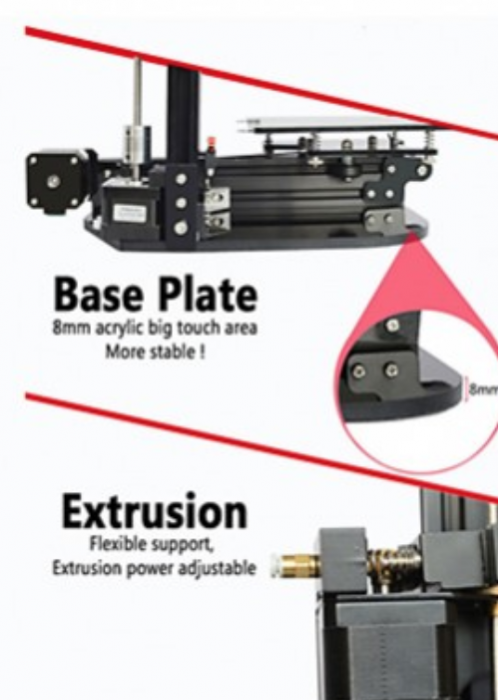
With its clean, desktop design the X-1 is quick to assemble and highly portable thanks to the robust carrying handle conveniently placed at the top. Extruded aluminum 2020 and 2040 sections make everything nicely rigid and these, combined with extensive use of acrylic panels keep the weight to a minimum.
Even if you have never built a 3D printer before, the clear, simple build instructions are very easy to use and there are many user groups on the internet for this product if you run into trouble. Put simply, if you can build Swedish furniture you can put this printer together.
Don’t want your laptop tethered to your printer? No problem; the Tronxy X-1 can use either a direct USB thether to your computer or you can print via a micro SD card. The X-1 can also be controlled using the 5-button controller and easy to navigate white on blue LED display, further eliminating the need to be tethered.
The X-1 is compatible with Win10, Windows XP, Windows 7 and Mac systems and uses simple to operate Reptier-Host with Cura or Slic3r for slicing into g-code for printing.
A build volume of 150 x 150 x 150mm is perfect for building most projects, especially if this is your first printer.
This is a great value printer for anyone on a budget, of course it doesn’t come with all the bells and whistles of more expensive printers but it does the job of a basic printer very well. Why wait? Take the plunge into the endless possibilities offered by 3D printing with the Tronxy X-1 desktop 3D printer!
Features
- Compact desktop printer
- Quiet operation
- Supports off-line printing via micro SD card or USB
- 0.1 ~ 0.4mm layer resolution
- Easy to read white on blue LCD screen
- Acrylic print bed for stability
- 5-button navigation
- Simple and easy to use
- Able to print accurately at high speed
- 12V 5A DC power source
Specs:
- Print size: 150 x 150 x 150mm
- Extruder: Single
- Resolution: X/Y 0.012mm Z 0.004
- Layer Resolution: 0.1mm
- Print speed: 20 ~ 150mm/Sec
- Technology: Extrusion (FFF)
- Control board: Melzi 2.0 v5
- Support Material: 1.75mm PLA
- Support Formats: STL/OBJ
- Operating system: Windows XP/7/Mac
- Support Software: Cura/Reptier-Host/Slic3r
- Input Voltage: 12V
- Power Supply: 12V/5A DC 100~240V power supply
- Mains plug: US type
- Nozzle: 0.4mm Ø
- Display: Wide angle LCD screen
- Nozzle temp: 170 ~ 275°C
- Overall dimensions: 340 x 365 x 350mm
- Weight: 3.5kg
Included:
- Tronxy X-1 Desktop 3D Printer Kit (UK Plug)
- 8GB micro SD card
- Micro SD card/USB adapter
- Manual
Tutorials
Cura is a slicing software used for preparing 3D printing files for printing. To use Cura, follow these steps:
- Install Cura: Download and install the latest version of Cura software from the official website.
- Connect your 3D printer: Connect your 3D printer to your computer via USB or Wi-Fi.
- Load 3D model: Load the 3D model you want to print by clicking on “Open File” in Cura.
- Select printer profile: Choose the profile for your specific 3D printer from the list of available profiles.
- Adjust settings: Adjust the settings such as layer height, infill, and print speed according to your preferences.
- Slice model: Slice the model by clicking on the “Slice” button. This will generate the G-code file, which is the code your printer uses to build the model.
- Save G-code: Save the G-code file by clicking on “Save to Disk.”
- Print: Load the G-code file onto your 3D printer and start printing.
Note: Before starting your first print, it’s recommended to do a test print with some basic model to ensure the printer is calibrated correctly and the settings are appropriate for your specific 3D printer.



Robo Admin T –
Good and Reliable Product!