Description
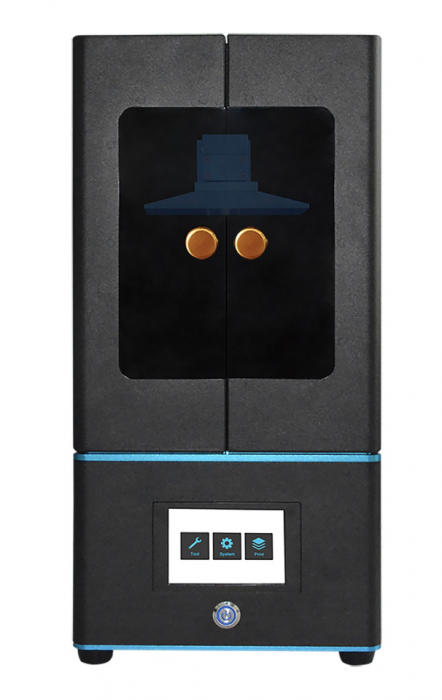
The Tronxy Ultrabot 3D Printer is a device that allows users to create three-dimensional objects by depositing successive layers of material, such as plastic or resin. It uses a computer-controlled process to create objects with intricate details and precise measurements.
The Tronxy Ultrabot 3D Printer is equipped with a number of features to ensure efficient and reliable printing. It typically has a large build volume, allowing users to create larger objects or multiple objects at once. It also has a high-resolution printing capability, providing fine details and accuracy in the final product.
Features
1. Brand new TRONXY® Ultrabot 2K LCD light-Curing 3D Printer
2. Support off-line print, you can forget about connection problems
3. With 120*67*180mm build volume
4. Easy to use
| Print Parameter | |
| Operate system | TRONXY |
| Display | 3.5inch touch screen |
| Print size | 120*67*180mm |
| Print thickness | 0.01-0.1mm |
| Print theory | UV curing molding technology |
| Print speed | 20mm/s |
| XY dpi | X/Y -0.047mm (1080P, 2K) |
| Z accuracy | 0.0025mm |
| Print materials | Photosensitive resin (405nm) |
| Software Parameter | |
| Slicer software | TRONXY |
| Input format | STL,OBJ |
| Output format | cbddlp |
| Connection | Thumb drive |
| Machine Parameter | |
| Machine size | 200*200*410mm |
| Packing size | 280*280*545mm |
| Machine weight | ≈7.25kg |
| Packing weight | ≈8.5kg |
Tutorials:
Cura is a slicing software used for preparing 3D printing files for printing. To use Cura, follow these steps:
- Install Cura: Download and install the latest version of Cura software from the official website.
- Connect your 3D printer: Connect your 3D printer to your computer via USB or Wi-Fi.
- Load 3D model: Load the 3D model you want to print by clicking on “Open File” in Cura.
- Select printer profile: Choose the profile for your specific 3D printer from the list of available profiles.
- Adjust settings: Adjust the settings such as layer height, infill, and print speed according to your preferences.
- Slice model: Slice the model by clicking on the “Slice” button. This will generate the G-code file, which is the code your printer uses to build the model.
- Save G-code: Save the G-code file by clicking on “Save to Disk.”
- Print: Load the G-code file onto your 3D printer and start printing.
Note: Before starting your first print, it’s recommended to do a test print with some basic model to ensure the printer is calibrated correctly and the settings are appropriate for your specific 3D printer.


Robo Admin T –
Great Product